Introduction
Astra DB simplifies cloud-native Cassandra application development. This blog will walk the reader through creating a PowerBI report against shopping cart data in Astra DB.
Problem
As a report developer, I’d like to create a Power BI report using shopping cart data stored in Astra DB.
Audience
This blog is targeted to Power BI developers who use the Microsoft development stack. It is assumed that the developer will use a 64-bit Windows environment.
Goal
By the end of this article, the reader should be able to create a Power BI report using data stored in the cloud using Astra DB.
Prerequisites
- Have created an Astra DB account and associated credentials.
- Have created the Shopping Cart data in Astra DB. Using this blog to complete
- Installed Power BI Desktop. Download here
- Downloaded the connection bundle to the Windows client
Procedure
- Configure the Apache Cassandra ODBC Driver
- Download the ODBC Driver download here
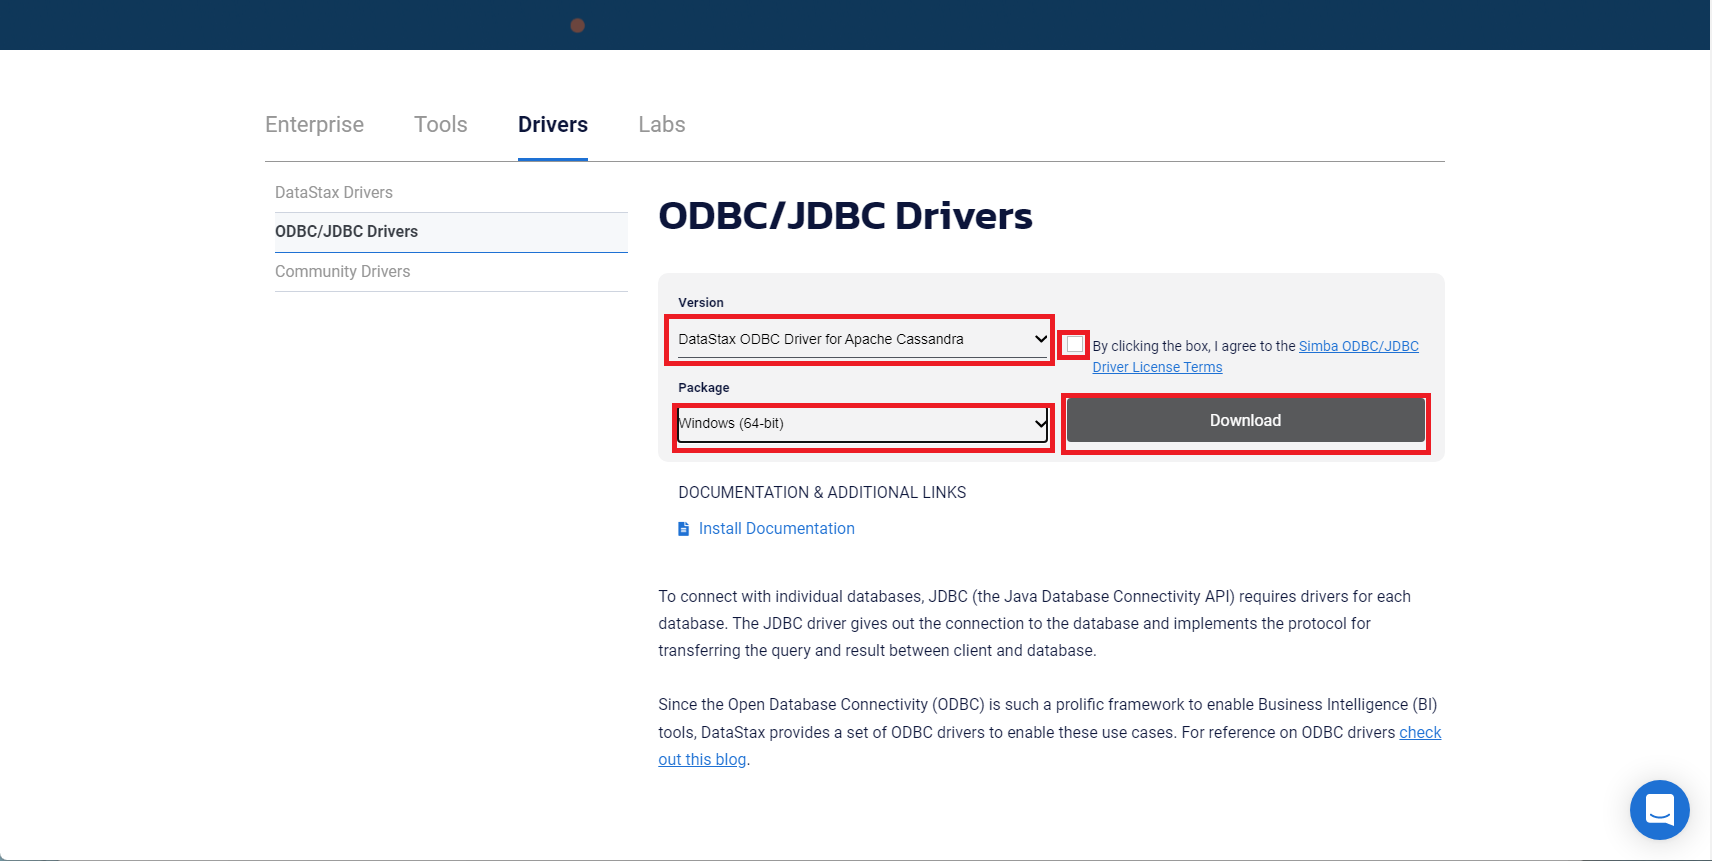
- Change the package to “Windows (64-bit)”
- Click the agreement box and then the download button
- Install the ODBC drivers.
- review the How to Use DataStax ODBC Drivers blog
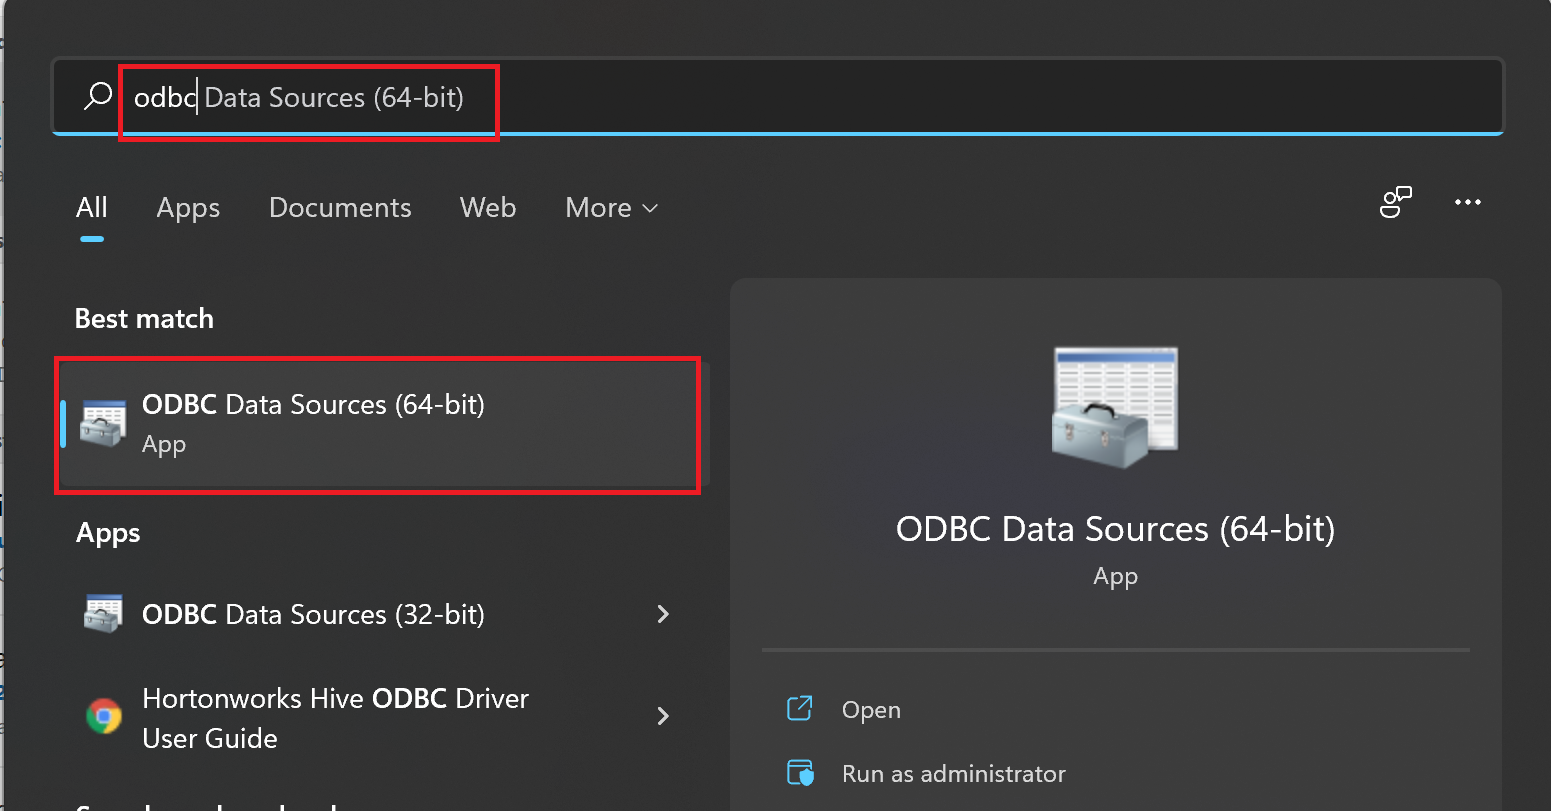
- Start the ODBC Data Sources (64-bit) application
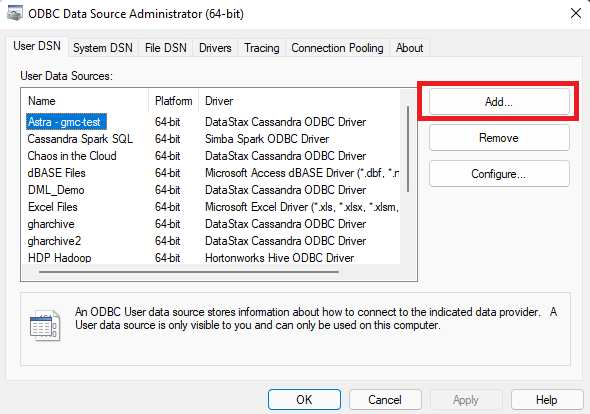
- Create new ODBC Entry
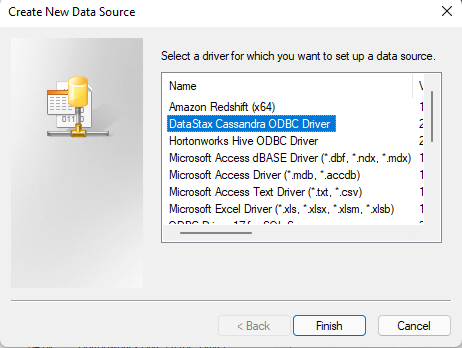
- Create a new DataStax Cassandra ODBC Data Source
- Configure the Cassandra ODBC Driver
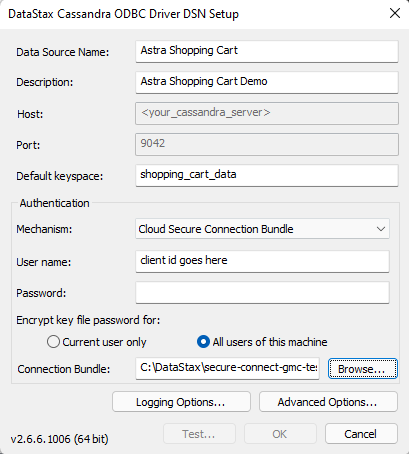
- Data Source Name: “Astra Shopping Cart”
- Descripton: “Astra Shopping Cart Demo”
- Default keyspace: “shopping_cart_data”
- Mechanism: “Cloud Secure Connection Bundle”
- User name: client id goes here
- Password: client secret goes here
- Connection Bundle: path to the connection bundle
- Test the client. Click the Test button
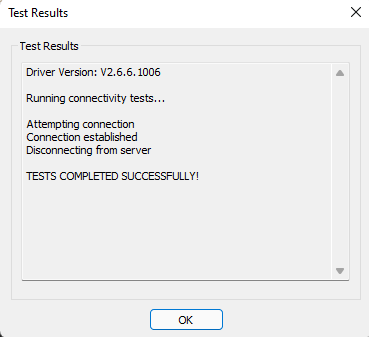
- should show that test test was successful
- Download the ODBC Driver download here
- Create the Power BI Report
- Start Power BI in Administrator mode
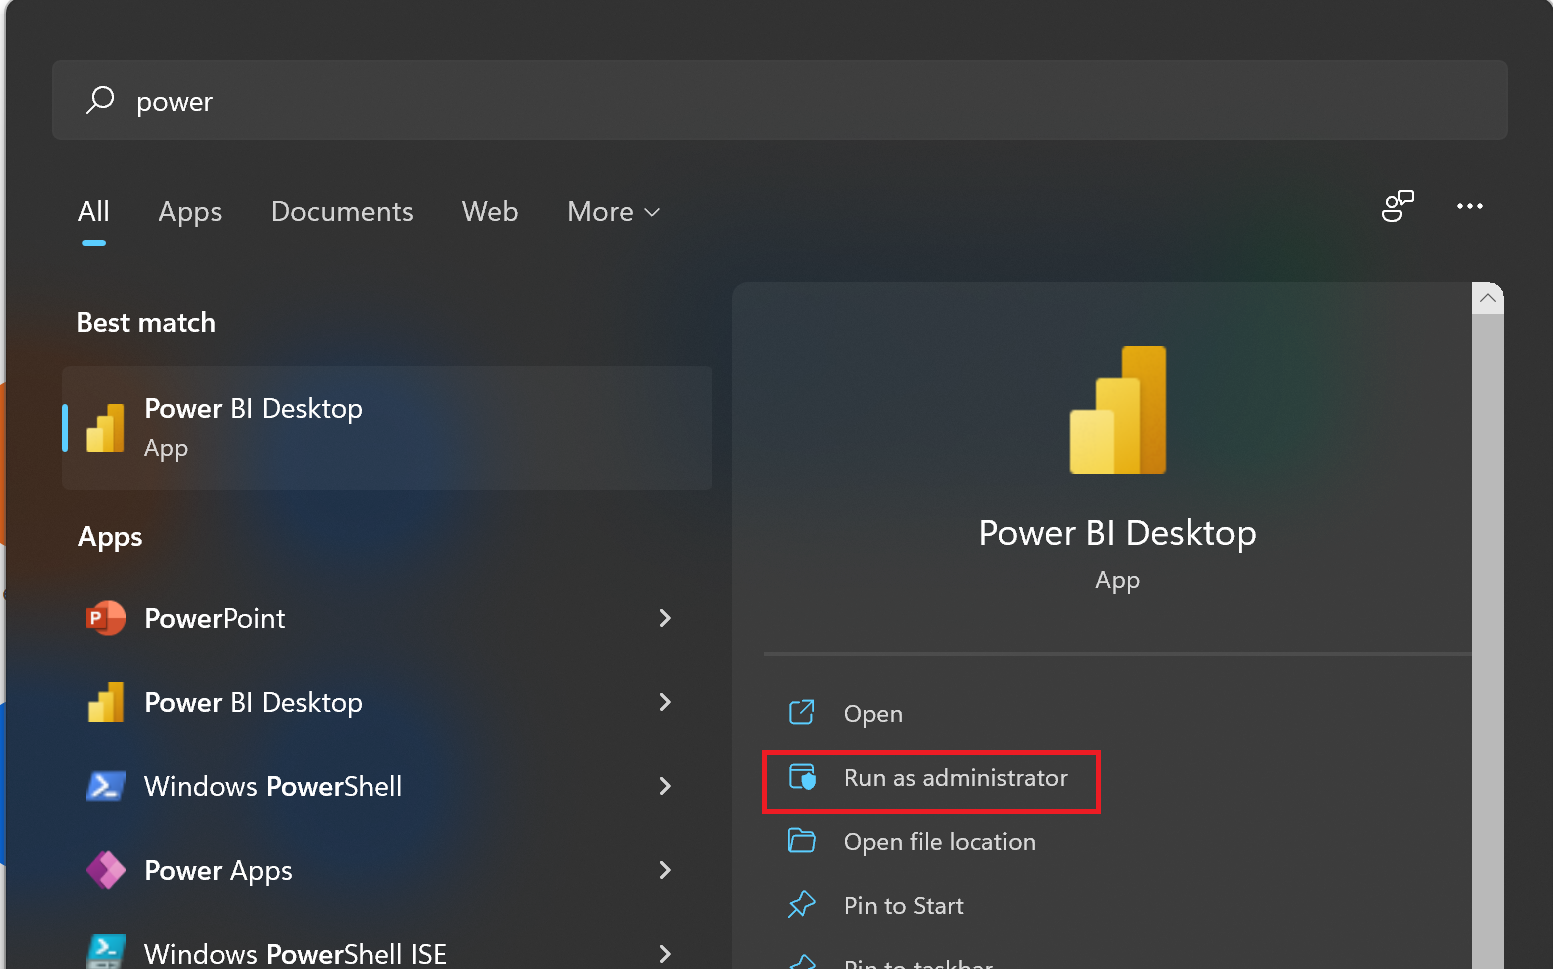
- Click Get Data
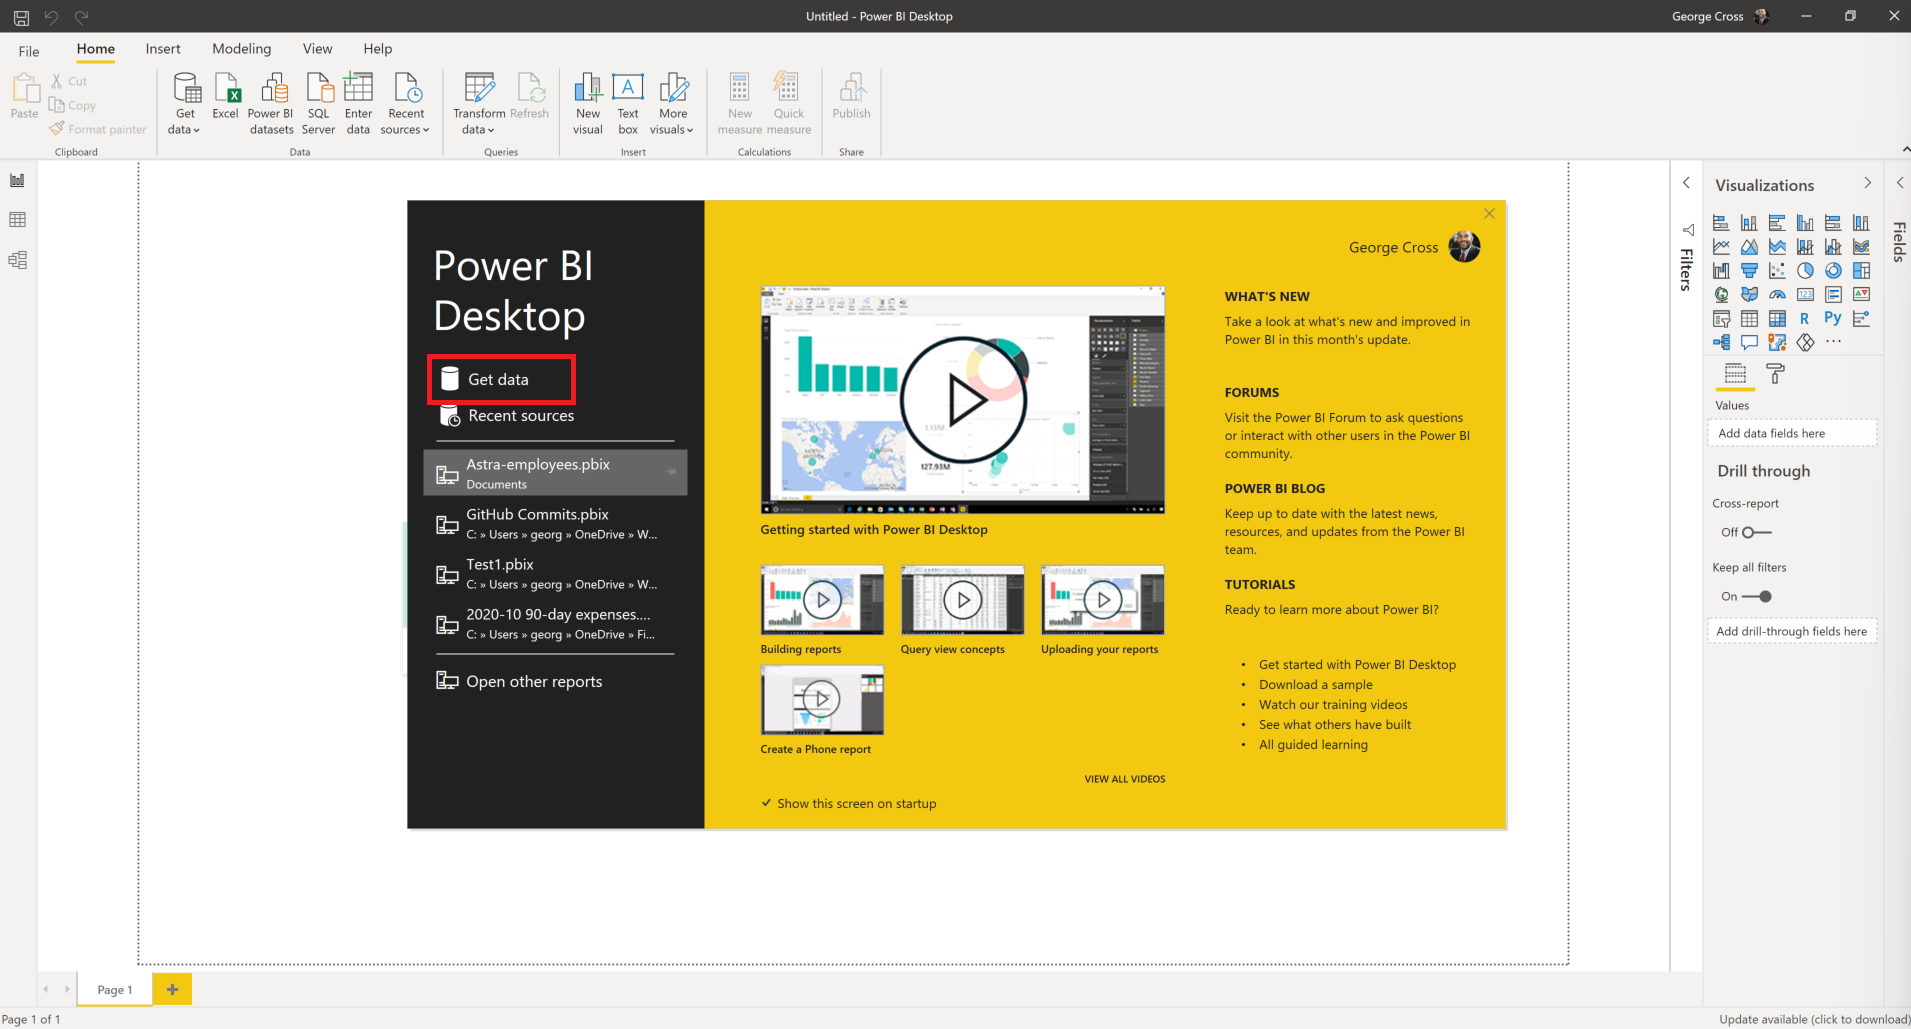
- Configure ODBC Connection
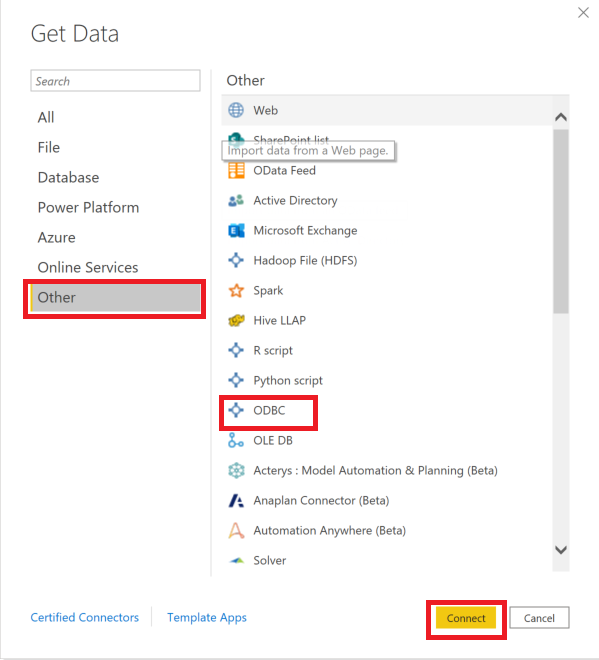
- Select “Other”
- Select “ODBC”
- Click “Connect”
- Select the ODBC Data Source

- Change drop down to “Astra Shopping Cart”
- Click OK
- Authenticate the ODBC Connection
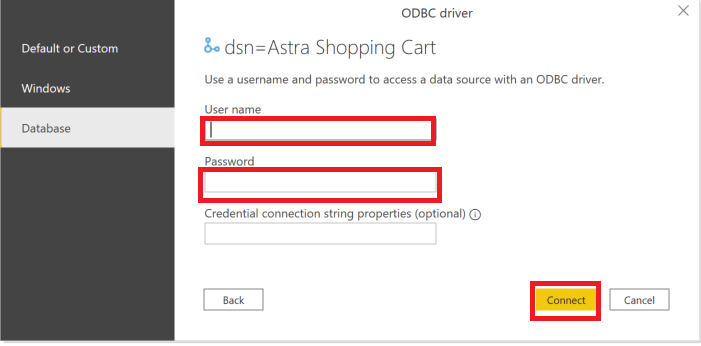
- user name: use the client id from Astra DB
- password: use the client secret from Astra DB
- Load the Shopping Cart data
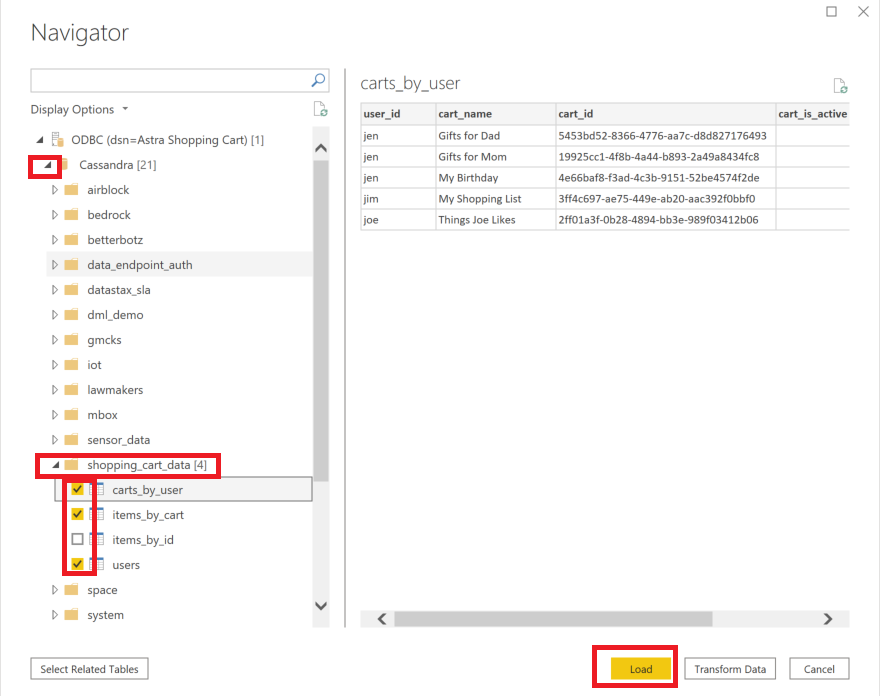
- Expand “Cassandra”
- Expand “shopping_cart_data” keyspace
- check the following:
- carts_by_user
- items_by_cart
- users
- Click the “Load” button
- Configure Page Visuals
- Add user slicer
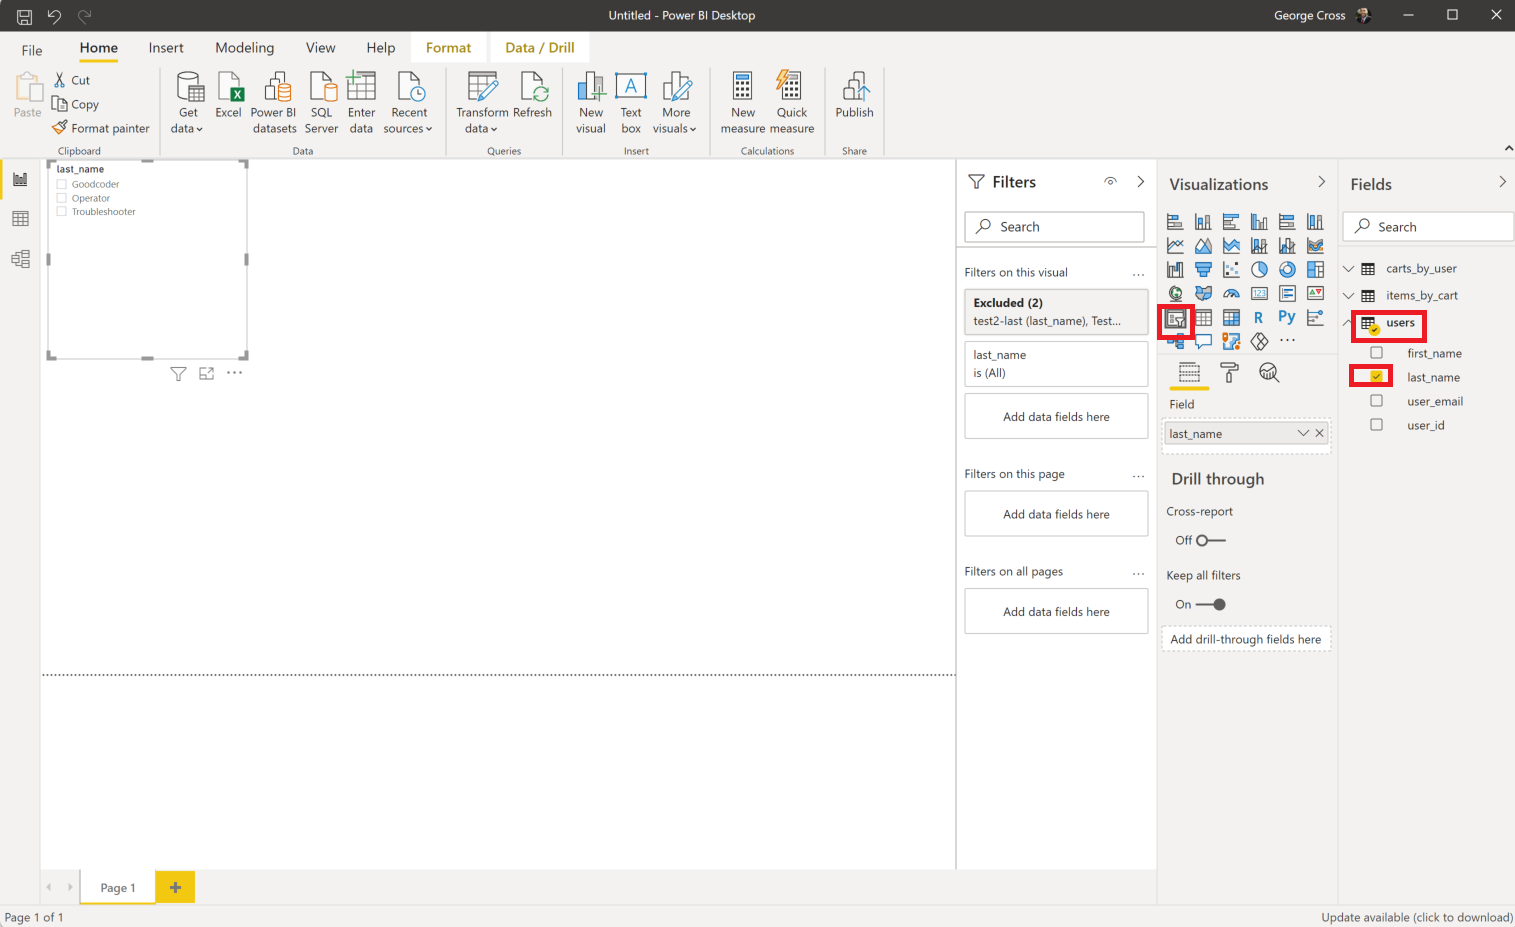
- Click Users table
- click “last_name” field checkbox
- Click the slicer visualization
- Change the Slicer text size
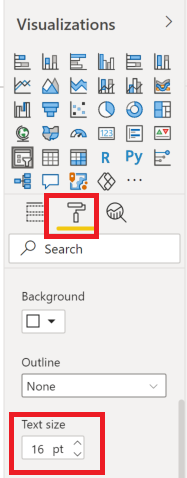
- Click the format icon
- change the Text size to 16 pt
- Change the Slicer title
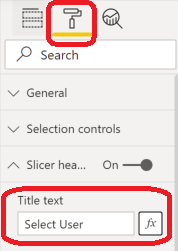
- Click the format icon
- change the Title Text to “Select User”
- Add the Selected Cart widget
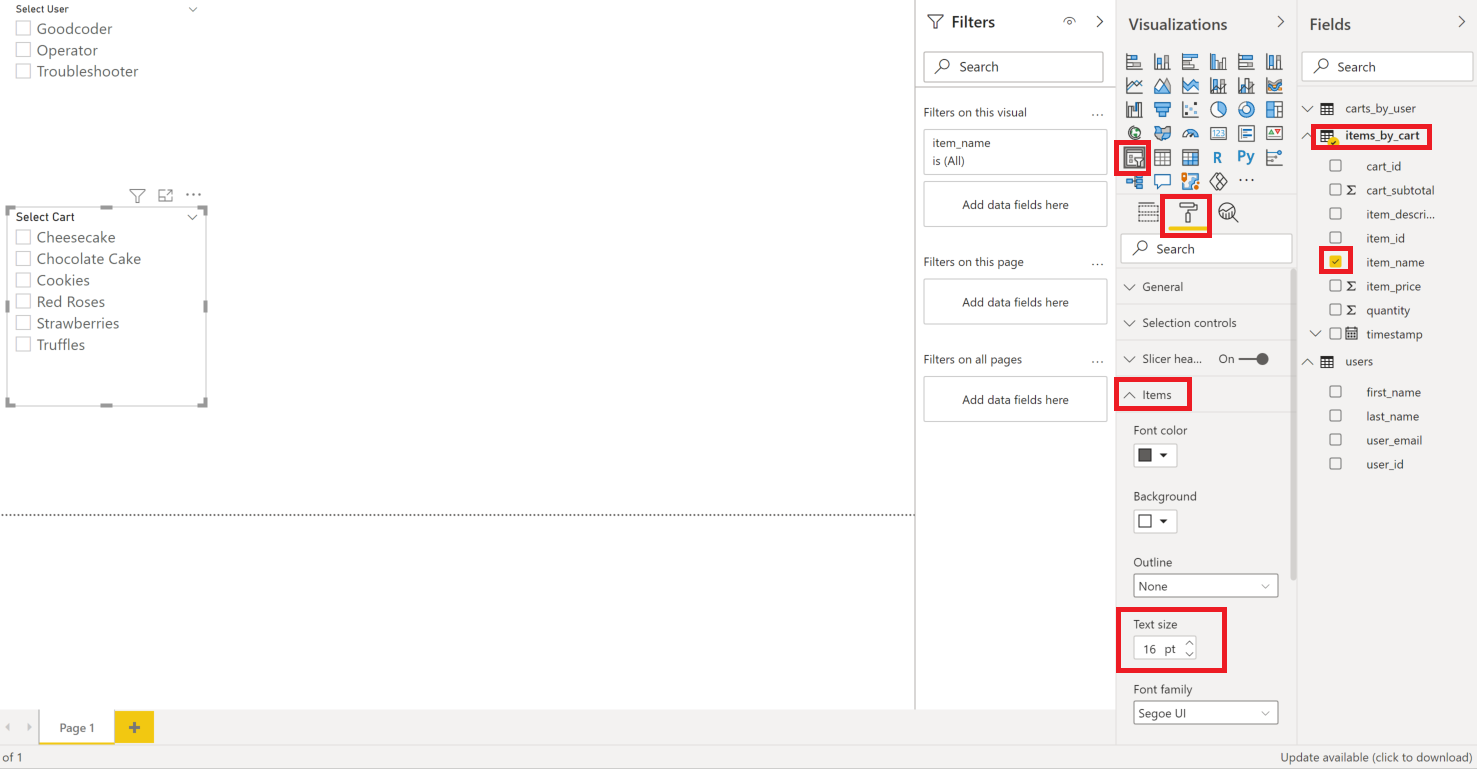
- Click an empty portion of the report. No widget should be selected.
- Expand the “carts_by_user” table and check the cart_name field
- Click the Slicer Visualization
- Change Slicer Heading –> Title Text to “Select Cart”
- Change Items –> Text Size to 16 pt
- Add the Item Quantity Column Chart
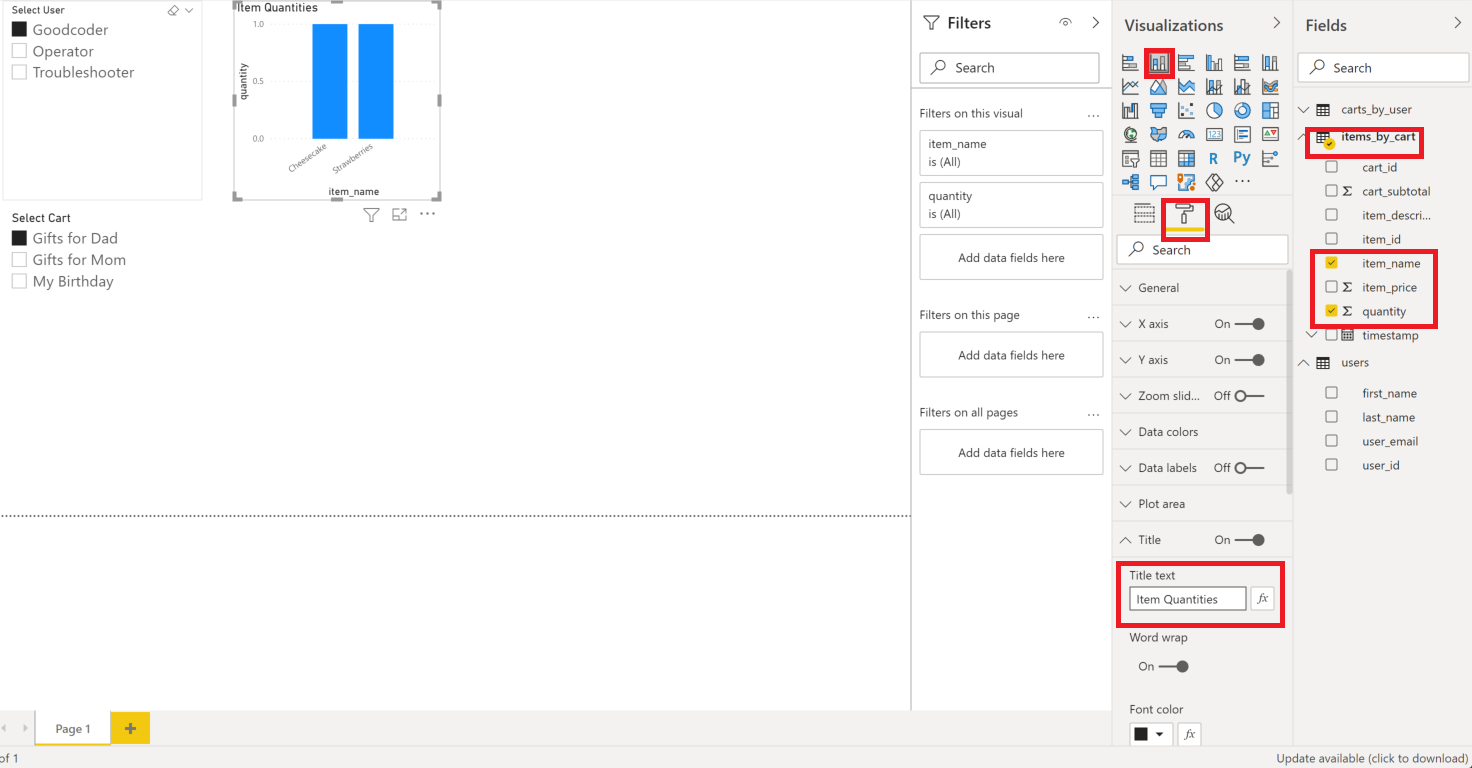
- Click an empty portion of the report. No widget should be selected
- Expand the items_by_cart table and click the following fields:
- item_name
- quantity
- click the stacked column chart visulization
- Change the Title Text to “Item Quantities”
- move the widget to the right of the User slicer
- Add the Item Quantity Pie Chart
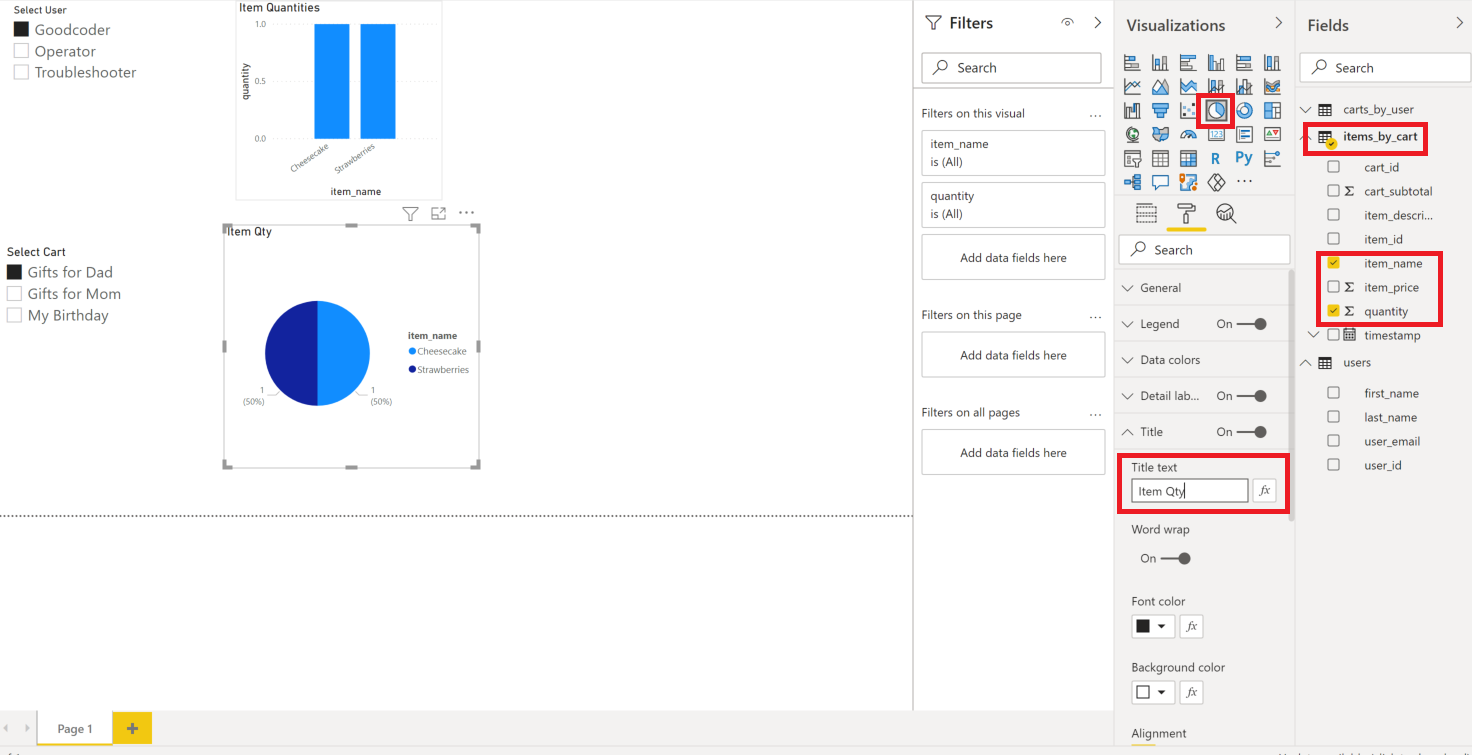
- Click an empty portion of the report. No widget should be selected
- Expand the items_by_cart table and click the following fields:
- item_name
- quantity
- click the pie chart visulization
- Change the Title Text to “Item Qty”
- move the widget to the right of the Cart slicer
- Add the Item Quantity table
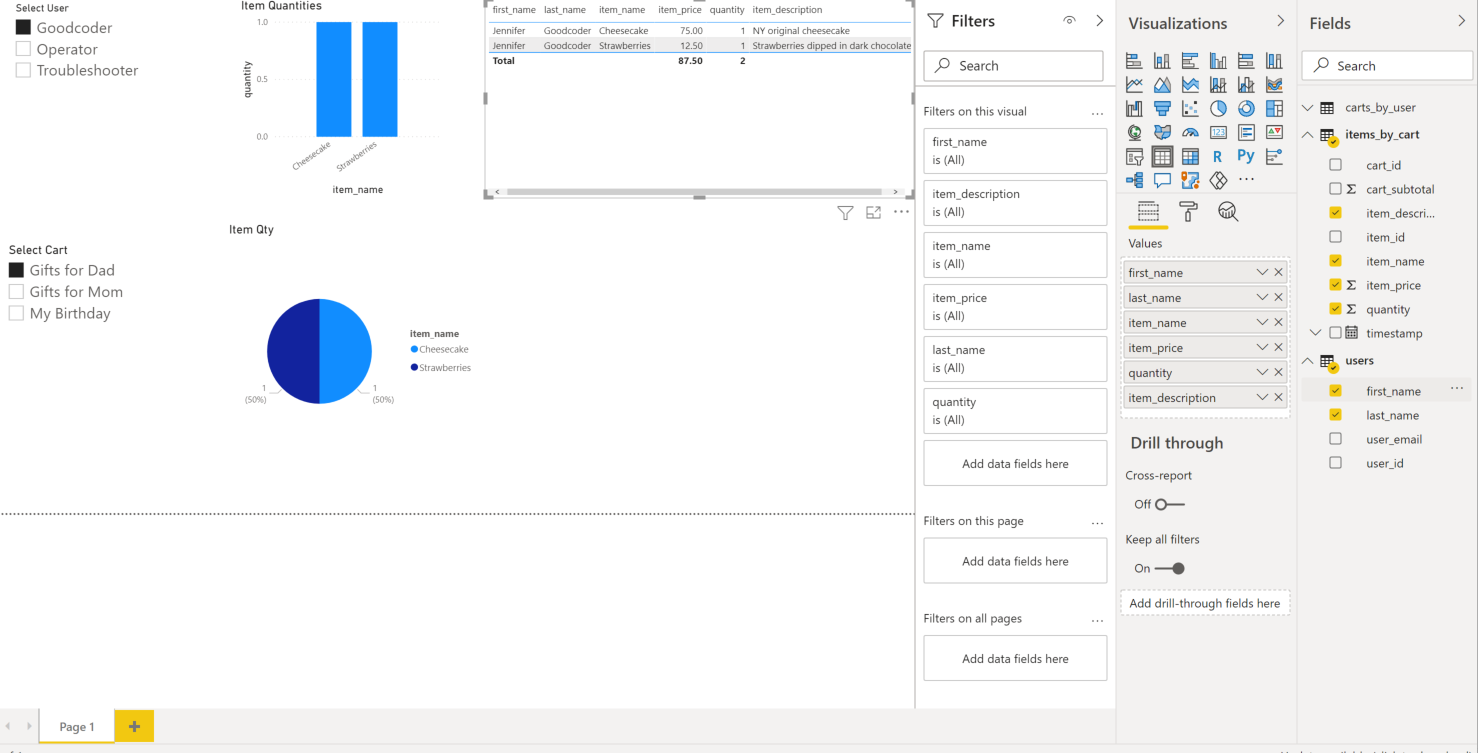
- Click an empty portion of the report. No widget should be selected
- Expand the users table and check the following:
- first_name
- last_name
- Expand the items_by_cart table and check the following:
- item_name
- Item_price
- quantity
- item_description
- Move the widget to the right of the Item quantity column chart
- Add user slicer
- Start Power BI in Administrator mode
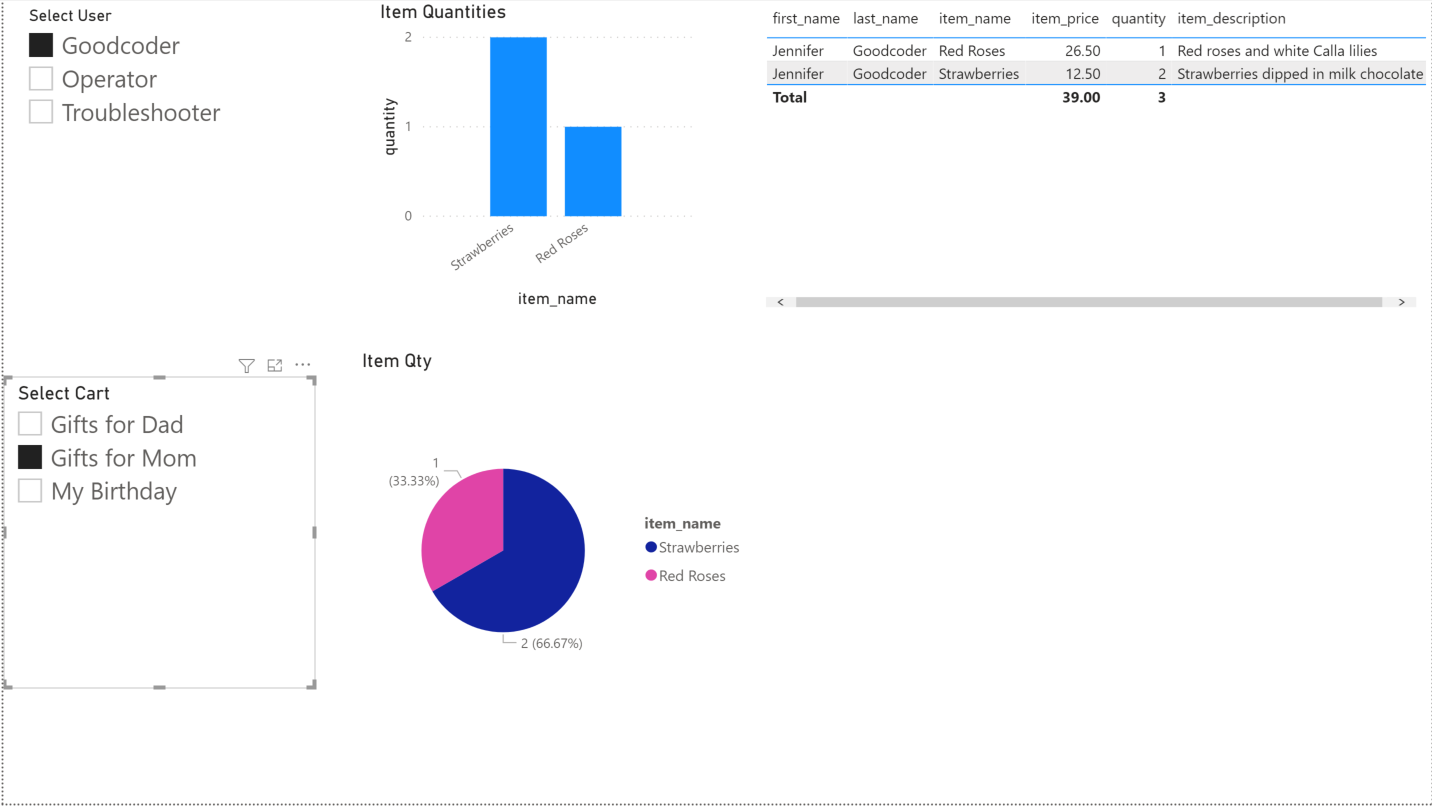
Results
The reader should now have a functioning Power BI report that uses the shopping cart database in Astra DB.
Next Steps
The following activities are designed to use the shopping cart data:
- Write a C# Shopping Cart MVC application using REST against Astra DB